
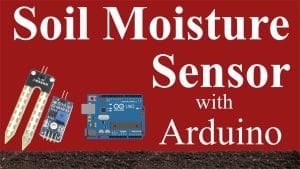
Lets make an automatic watering system. This project is an extension of our prior experiment, where you learned how to connect moisture sensor to Arduino. This time we are also going to connect a relay and water motor to the Arduino. We will then write a program to take input from soil moisture sensor and switch on or switch off the water motor based on the data received from soil moisture sensor.
What is Automatic Watering System for plants?
The automatic watering system helps you to water plants at your home, garden or farm in your absence. It uses technology to detect the moisture level of the soil and automatically water the plant when there is no moisture detected in the soil.
Can I make one myself?
Yes, this is what learn by watch do, helps you to learn to do things yourself. We have created a video and this post to show you the procedure to make it on your own. If you will follow both carefully you will be able to make it yourself. If you face any problem as in the comment. You can also ask us for the paid services.
How long does it take to make an automatic watering system myself?
It depends on your prior knowledge and experience with Arduino. If you are new to that and follow the video and instructions given in this post, you should be able to make it within a day. But if you are planning to showcase in some science exhibition, We recommend you to start at least one week prior to the deadline.
What are the required components?
The required components are given below. We have also provided links to buy the components from Amazon and Flipkart so you do not have to waste your time in search for the right component.
- Arduino Uno R3: http://amzn.to/2srIMT3 | https://goo.gl/MkGoQC
- Soil moisture sensor: http://amzn.to/2sQLiCJ | https://goo.gl/B9ewV6
- Buzzer: http://amzn.to/2sXK2sz
- 4 Channel Relay for Arduino: http://amzn.to/2s09f8s | https://goo.gl/Dtd7Xb
- Jumper wires: http://amzn.to/2s9wfkc | https://goo.gl/QK5BN4
Source code
int ACWATERPUMP = 13; //You can remove this line, it has no use in the program.
int sensor = 8; //You can remove this line, it has no use in the program.
int val; //This variable stores the value received from Soil moisture sensor.
void setup() {
  pinMode(13,OUTPUT); //Set pin 13 as OUTPUT pin, to send signal to relay
  pinMode(8,INPUT); //Set pin 8 as input pin, to receive data from Soil moisture sensor.
}
void loop() {
  val = digitalRead(8);  //Read data from soil moisture sensor
  if(val == LOW)
  {
  digitalWrite(13,LOW); //if soil moisture sensor provides LOW value send LOW value to relay
  }
  else
  {
  digitalWrite(13,HIGH); //if soil moisture sensor provides HIGH value send HIGH value to relay
  }
  delay(400); //Wait for few second and then continue the loop.
}


95 comments
Anonymous
Please help! This guide and code is wonderful for my son who has successfully set everything up. But the motor runs whether the sensor is dry or wet. What are we missing?
Anonymous
Can u show how to run program & when program run is it automatically supply water to plants
Anonymous
Dear Mr Rajkumar sir.
Please make a tutorial for firebase iot eith esp 8266, control 4 channel relay by android application.
Anonymous
Im using aquarium water pump is it still work?
Anonymous
I can get the code to work everything functions just can not get the code to use more than 1 relay / pump.
Anonymous
Hey, hi
I tried to use the same method and code, but it is not working for me
The motor is not working in both the connection, i dont see any results
Anonymous
sir, is it necessary to use 4 channel relay or simply we can use 1 channel relay
Anonymous
Sir can I use 1hp motor for this project with this program
Anonymous
pls help me i need help in coding.
thanks and regards
my mobile no. is 9811112460
Anonymous
pls help me i need help in coding i will pay for the code/project.
thanks and regards
my mobile no. is 9811112460
Anonymous
We want to buy this project for knowing details give ur mobile number
Anonymous
can u give ur mobile number
Anonymous
I want to buy this project is it available??
Anonymous
hi admin i have some hours only to submit project on automatic plant watering system and the code you write above is done. but how i made simulation please help me if you can by sending video
Anonymous
how i use moisture sensor with LDR and write ardiuno code for this with its simulation
Anonymous
Do we have to keep on taking the sensor out and in.??.
Anonymous
Hi
Error shows me that
‘digitalread’ was not declared in this scope
Plz help me to solve this
Anonymous
Sir,
This post helped me to develope my school project based andrino
Anonymous
Hi. Can you help us? We are using this code but it didn’t work we are using a dc motor while the sensor is humidity sensor. Thankyou
Anonymous
Sir Iam getting reverse of that
When I placing soil moisture into soil water is coming after removing sensor water is not coming
It’s doing reversly i have to submit with in 2days provide me answer fastly
Anonymous
i need to use this as a school project but am lacking its research proposal, can you please get me a copy
Anonymous
Can this project be controlled via an Android app?
Anonymous
Sir please reply to my comment.
Anonymous
where i buy the draining motor?
Anonymous
Can i use an aquarium.pump with 5 watts of power and 110-120/220-240 voltage
Anonymous
sir can we use aquarium pump rather than ac motor??..what should be the code are we going to use??
Anonymous
Hello sir, i use aquarium pump instead of the motor. Is it okay of i didnt use the relay?
Anonymous
Sir I want circuit diagram
Anonymous
hi sir
i want to supply water without using water sensor and i want to supply water daily at time to time . can u please give me the program
Anonymous
hi sir
i want to supply water without using water sensor and i want to supply water daily at 9pm for 5mins. can u please give me the program for that i am very poor in programming.you can mail me at azmiabdullah2013@gmail.com
Anonymous
sir can i know all the circuit that use in this project
Anonymous
Thank you for your support
Anonymous
Sir my circuit is complete but the motor does not stop even when water is full in the pot .
I also don’t know which variable should I put to describe the signal received from the sensor. But still the programming is been uploaded.
Anonymous
You can send us your mail id to my mail so that we can Contact you if there any urgent need. I assure you that your mail id will be safe and not be misused.
Anonymous
you can contact me here: yogendra.pal3@gmail.com
Anonymous
Sir how to know which variable should I put to describe the signal received from sensor
Anonymous
A relay is an electromagnetic switch operated by a relatively small electric current that can turn on or off a much larger electric current. So, you need relay only if you want to operate AC devices. You can directly send the signal (current) to DC motor, you do not need relay for that.
Let me know if this is helpful.
Anonymous
sir i followed all the steps given above.there is no error while compiling and uploded completely but project is not working :(.please help me
Anonymous
Hi Vamsi, Please share your project story with us once you submit it. You can use images, videos, text etc and we will show it in our blog. You can submit your story at learnywatch@gmail.com
Anonymous
Thank you so much sir…we are very happy for your help. If you don’t mine may we contact you through Gmail.
My mail id is
vamsikrishnan150808@gmail.com
Anonymous
Sir, I’m making this project and I want to know the power supply of adruino board. So, please help me to get the power adapter for this project. Please suggest me. I’m very thankful to you for your kind support.
Anonymous
In automatic irrigation system we’re we use the buzzer
Anonymous
should we use only the 4 channels or we can use 2 channels also?
please answer me quickly because i have to complete the project
Anonymous
should we compulsorily use the channels for this project?
Anonymous
hello sir i have done a demo for this project it have successfully operate,Now my question is how can you combine many moisture sensor and many pump to operate in one project
Anonymous
Sir I want interfacing soil moisture sensor and DC motor program
Anonymous
Arduino uses its own programming language. It comes with an IDE you have to learn how to write a program and how to upload it to arduino. Watch this tutorial: http://learnbywatch.com/how-to-connect-an-arduino-to-pc-or-laptop/
Anonymous
Hi i am doing the project of automatic watering plants using arduino.
I have done the connections according to the video given.
I am sorry i did not understand the above codings posted in the above comments as i just have the very basic info. about coding done at school (c++).
The problem is that when i give the power supply to both the arduino and the dc water pump, the pump starts working and also the sensor is dry. But now is the problem….
The pump is running but according to the project the pump should stop when the sensor is dipped in water/wet soil. But that does not happen.
When i take it out it stops. Again when i dip it in water and take it out it starts. This happens only a few times and then stops and nothing works.
PLEASE SOMEONE SEND ME THE CORRECT CODING AS I HAVE TO SUBMIT THIS PROJECT NEXT WEEK AT SCHOOL.
The pins for the coding is given below…
The DO from the sensor – pin 9
Pin 12 from arduino – IN1 of relay.
Again please send me the correct coding and advice me if there is any problem.
Anonymous
Hi, there was a problem in first line. Replace AC WATER PUMP with ACWATERPUMP and the program should work. Infact you can remove first two lines of the program and it should work perfectly.
Anonymous
Good stuff ! I’m willing to do this project but I have small query. What if water from source get empty ? Because if there is no water to suck, the motor can fail or damage. How to overcome this small issue?
Anonymous
send me the code of this project… pls..
Anonymous
The things working reversly ..like the water is being pumped when there is moisture and not being pumped when no moisture..please help me regarding this…
Anonymous
how to link this device with a gsm module
Anonymous
Hi
I am Pratham
The coding you gave in the videos not working can I ask for the correct coding I used 1 channel relay board instead of 4 channel relay board and other things are same
Thank you
Anonymous
Hi, I am a complete beginner. How to use this device for multiple plants at once? I mean if I use 2 motors and soil sensors, how to make it work for both?
Anonymous
Can i use 5v dc or 12 dc motor seam relay
Anonymous
help me how to connect pizzo buzzer in the arduino and code for buzzer
Anonymous
Can anyone tell me wat is the order in which v have to connect the wire in the relay
Anonymous
I have coded the arduino and done all the connections as shown in the video but the pump isn’t coming on.can I get some help on making it work
Anonymous
GPIO.setup(16, GPIO.IN)
GPIO. setup(18, GPIO.OUT)
GPIO.setup(7, GPIO.IN)
GPIO.setup(7, GPIO.IN)
try:
while True:
if GPIO.input(16)==1
GPIO.ouput(18, True)
if GPIO.input(7)==1
GPIO.ouput(15, True)
else:
GPIO.setup(18, GPIO.OUT)
GPIO.output(18,GPIO.OUT)
GPIO.setup(15, GPIO.OUT)
GPIO.output(15,GPIO.OUT)
Anonymous
Hello
I am trying to write a code for two soil sensors using python. i got it work for one sensors , but i could not do it for two sensors, so my question is there a specific loop for two sensors ??BTW, I am using Raspberry pi
Anonymous
Hi, please help me. When I compile the program at the beginning there is no error but when I want to upload it to the board it says that it can not as if it did not detect it.
Then, I got a 3-6 v motor and I connected it to a cell phone charger like in the tutorial but I checked all the connections and it does not work. I hope you can answer fast
Anonymous
Hi, I am receiving the reverse for the output…..when the soil moisture sensor is placed on dry soil then water is not flowing while water is flowing when the soil moisture sensor is placed in wet soil…How to overcome this?
Anonymous
Great project. really enjoyed it. Could you do a project where you control this type of thing via wifi or app?
Comments are closed.